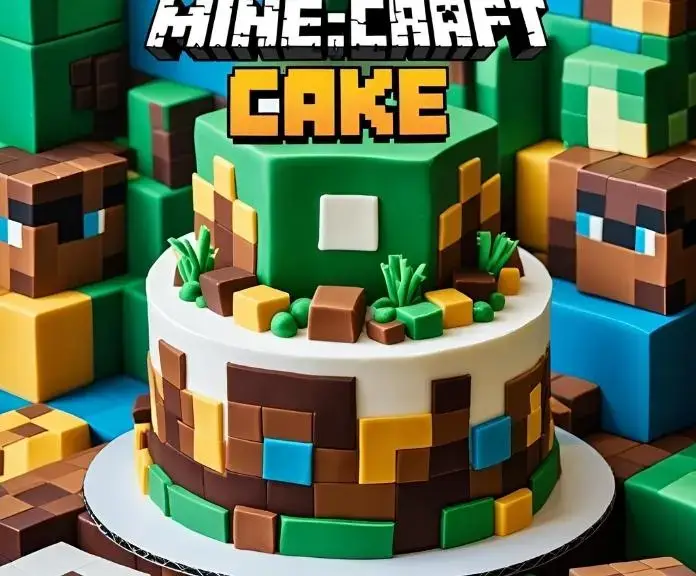
Minecraft Cake: 9 Powerful Ways to Level Up Your Baking
Minecraft cakes, whether for a birthday, game-night party, or simply to commemorate your favorite blocky world, make every gamer’s eyes light up. You’re going to discover the techniques behind those astounding creations if you’ve ever gazed longingly at pixel-perfect squares piled high with colorful frosting. With constructive advice at every stage, this guide will teach you how to master the Minecraft cake, from selecting the recipe to coming up with daring decorating ideas.
You’ll learn how to create the ideal Creeper, bake faultless square layers, and use fondant and icing like an expert. Do you lack? Do you lack prior experience? No issue! Every method is divided into simple, doable steps so that experienced bakers can advance and novices can create a masterpiece. This guide includes party ideas, creative shortcuts, and stunning finishes that will turn your cake into the talk of the party.
Are you prepared to add layers, power up your kitchen, and make the Minecraft world come to life? Let’s get started—this is where your ultimate Minecraft cake adventure begins.
Mastering the Recipe for Minecraft Cake
Traditional Minecraft Cake Recipe
You only need a little imagination and a few basic ingredients from your pantry to make the best classic Minecraft cake. Picture this: golden, fluffy squares stacked like ideal building blocks, each one waiting for your pixel-inspired designs to be placed on top. First, collect the following ingredients: flour, sugar, eggs, butter, vanilla extract, and a small pinch of baking powder. Use a square or rectangular baking dish to simulate Minecraft bricks.
Pour the batter in, toothing it to all the edges, after blending the dry and wet ingredients until they are smooth. To avoid unanticipated creeper holes, gently tap the pan on your counter to release air bubbles. A toothpick should come out clean after baking. After cooling, frost with vanilla or chocolate buttercream and apply colored fondant for grassy tops and beautiful pixel patterns. The ordinary becomes extraordinary all of a sudden—and your kitchen? Your own virtual world has come to life.
Easy Steps to Create Pixel-Perfect Layers
- To ensure even baking, prepare the batter using ingredients that are at room temperature.
- For clean, crisp cake edges, use parchment paper.
- To achieve a real 8-bit effect, color portions of fondant in the traditional Minecraft colors—bright green, soft brown, and stark white. Then, cut the colored fondant into squares and place them on top of your cake.
A Vegan Version of the Mine Do you think going vegan will deprive you of flavor and enjoyment?
payment? You’re not in the right place. This plant-based Minecraft cake uses healthy ingredients to capture all the whimsical elements. To keep your texture rich and moist, use applesauce or flaxseed instead of eggs. Coconut oil provides that delicious, bouncy crumb that every baker desires, and almond or oat milk can be used in place of dairy.
Balance—enough taste, lift, and visual appeal—is crucial. To begin, whisk together the dry ingredients (flour, baking powder, and a pinch of salt). Mix your vegan egg substitute, nondairy milk, and vanilla in a different bowl. Fold with air for a light, fluffy foundation. Allow it to cool after baking (don’t overbake!). Then, top the cake with either a coconut whip or plant-based buttercream. For those vibrant, blocky details, apply layers of fruit leathers or fondant that has been naturally dyed. Not only is it vegan, but it’s also colorful, delectable, and completely game-worthy.
The Best Ways to Make Vegan Cakes Stand Out
- For a natural lift, add apple cider vinegar or lemon juice to your nondairy milk.
- For realistic Minecraft colors, use vegan food coloring (spirulina for greens, beet powder for reds).
- To help plant-based butters maintain their shape, chill your cake before decorating.
Layers for Themed Cakes: Vanilla vs. Chocolate
Why limit yourself to a single traditional flavor? Variety creates beauty in the world of Minecraft, and the same is true for your cake. Chocolate and vanilla layers alternate to form block-like stripes that resemble the game. Chocolate adds a rich earthiness that is ideal for simulating Minecraft dirt blocks, while vanilla layers provide a creamy blank canvas.
Before stacking, make sure to allow each layer to cool completely after baking it separately. Think about adding a surprise element: colored buttercream in between the layers, maybe red for Minecraft bricks or green for grass. Each slice is delightful when put together, displaying pixelated stripes that appear as though you mined them yourself. The taste? Outstanding. The appearance is immediately Instagrammable.
Combining Different Ingredients to Create the Perfect Minecraft Cake
- Combine chocolate fudge with vanilla sponge for a stunning contrast.
- To ensure smooth stacking, precisely square each layer.
- For added dimension, use flavored syrups (such as orange or espresso) in between layers—because real bakers, like Minecraft, obey the rules.
Allow your creativity to guide you throughout your baking journey; the end product will be a visual feast and a memorable experience. Every section advances your mastery of the Minecraft cake and encourages even experienced builders to attempt something daring and completely original.
How to Make Cake Designs in Minecraft Pop
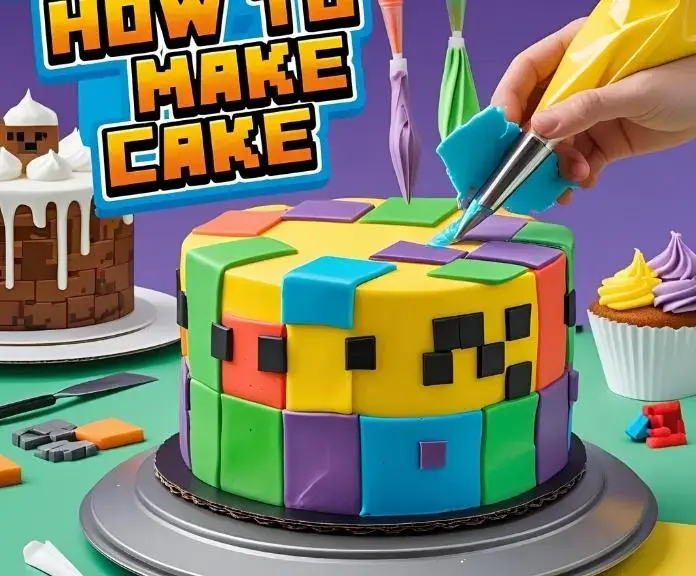
Crucial Equipment for Cake Decorating
Having the appropriate tools on hand is essential to making your Minecraft cake come to life with those blocky, pixel-perfect designs. They are necessary for any builder (or baker!) to streamline the process and improve the end product:
| Tool Name | Purpose & Tips |
| Square Cake Pans | Bake precise block-shaped cake layers mimicking Minecraft cubes. Using square pans helps get those iconic crisp edges. |
| Paring and Craft Knives | Perfect for trimming cake edges cleanly and cutting fondant into neat squares or shapes. Small blades offer fine control for pixel details. |
| Cake Turntable | Easily rotate your cake while decorating, ensuring smooth and even application of frosting or fondant across all sides. Optional but highly recommended. |
| Palette and Offset Spatulas | Spread buttercream or ganache smoothly, particularly on corners and flat surfaces, to ensure clean lines. A spatula is great for avoiding finger smudges. |
| Fondant Smoother | Helps press and smooth fondant onto cake surfaces evenly, eliminating bubbles and wrinkles for that flawless pixelated look. |
| Dresden Tool or Fine Sculpting Tools | These tools are ideal for adding tiny fondant or icing details, as well as for carving cool textures or patterns that resemble the pixelated surfaces of Minecraft blocks. |
| Paintbrushes | For applying edible dusts, gels, or diluted food coloring—perfect for shading and adding depth to block details without overwhelming flat color. |
| Piping Bags and Tips | Essential for icing outlines and filling in pixel patterns with precision. Use small round tips for dotting pixels accurately or star tips for texture. |
| Square Cookie Cutters | Spread buttercream or ganache smoothly, particularly on corners and flat surfaces, to ensure clean lines. Spatula: This tool helps avoid finger smudges. |
Pro tip: Organize your tools before starting so you can focus on decorating without interruptions. A clean workspace and excellent lighting help focus on pixels.
Step-by-Step Pixel Icing Techniques
Achieving Minecraft’s iconic pixelated look starts with thoughtful icing application—every square matters. Here’s a step-by-step guide that makes creating crisp, blocky patterns simple yet stunning:
| Step Number | Action | Details and Tips |
| 1 | Prepare Your Base Layer | Apply a smooth, even, thin layer of buttercream or ganache to your cake as a “blank canvas.” Chill briefly to firm it up before decorating. |
| 2 | Outline the Pixel Grid | Using a small round tip piping bag, pipe straight lines vertically and horizontally to create a grid pattern. Spaces should match Minecraft pixel sizes for authenticity. |
| 3 | Fill the Pixels | Apply a smooth, even, thin layer of buttercream or ganache to your cake as a “blank canvas.” Chill the cake briefly to firm it up before decorating. |
| 4 | Use Contrasting Colors | Alternate light and dark shades to replicate Minecraft’s distinctive block textures (grass, stone, wood). This adds dimension and interest. |
| 5 | Smooth and Correct Edges | After filling, lightly press a flat spatula over the icing pixels to even out heights and sharpen edges. A toothpick can clean up edges if needed. |
| 6 | Add Final Details | Use fondant shapes or edible paint to create characters or special block features, like creeper faces or diamond ores, for that wow effect. |
Keep pixel borders neat by working softly and cleaning equipment between colors. First, practicing the grid method on parchment paper can help you feel more confident.
Minecraft Cakes: Fondant vs. Buttercream
Like choosing your Minecraft skin, selecting between fondant and buttercream can be challenging. Fondant and buttercream have their pros and cons for that classic blocky look, but one may be better for your baking.
| Feature | Fondant | Buttercream |
| Appearance | Provides a smooth, firm, and matte finish with sharp, crisp edges—ideal for geometric precision and 3D shapes. | Offers creamy texture and vibrant but softer color gradients. Slightly less sharp edges, but excellent for layering and blending. |
| Ease of Use | While it is easier to pipe and spread, creating exact pixel edges can be more difficult without skilled piping. | Although it is simpler to pipe and spread, it can be more challenging to create precise pixel edges if you are not a skilled piper. |
| Durability | Holds shape well at room temperature, especially for decorated blocks and figures. Less affected by heat. | More sensitive to heat and humidity; risk of melting or sagging but fantastic for quick, flavorful decoration. |
| Customization | It can be dyed vivid colors, molded into complex shapes, and cut into pixel squares easily for authentic Minecraft textures. | Allows easy flavoring and coloring; great for soft-texture “pixels” and blended pixel patterns but less sculptural. |
| Taste & Texture | The icing has a slightly chewy and sweet flavor, but some people may prefer other textures over it. | Rich and creamy, and it melts in your mouth. Usually the crowd favorite for eating. |
| Best Use Cases | Ideal for creating bold, blocky shapes, detailed figurines, and clean pixel art on cake surfaces. | Best for smooth backgrounds, layering colors, and piping pixel-like dots or borders. |
MBakers use both a fondant base for structure and piped buttercream pixel accents on top to create the best Minecraft cake. This mix combines excellence and taste to make a cake that looks excellent and tastes outstanding.
Tips for Beginners on How to Bake a Minecraft Cake
Getting the Square Shape Just Right
A true Minecraft cake showcases a distinctive geometric design. The perfectly square layers are not merely for decoration; they transform a simple cake into a pixelated work of art reminiscent of the game. To start, choose either this approach or rectangular baking pans. This guide’s approach will help you achieve sharp and even edges. It may seem obvious, but if you bake in round or oddly shaped pans, you will need to do extra trimming, which causes cakes to lose their clean, block-like appearance.
Once your cake is baked and cooled, which is crucial because warm cake is fragile, use Take your time; you’re not just cutting the cake, you’re also shaping it into smooth blocks. into smooth blocks. A simple guide, such as a ruler or a light pencil mark on parchment paper, can help ensure that your squares are all the same size. The goal of this guide is to achieve accuracy: edges that snap with a clean, satisfying look, just like the digital blocks we love.
Cool your cake layers in the fridge before assembling. The process makes the crumb firmer, which makes it less likely to break or bend when you add icing or more layers. It It also helps maintain sharp corners when you assemble the cake in a cooler environment. The better the quality of your building blocks, the more impressive your entire Minecraft creation will be.
Moisture Hacks for a Whole New Level of Texture
Biting into a dry, thick, or crumbly Minecraft cake is the worst. Moisture is the secret ingredient that makes your baking go from amateur to pro. Here are some great tips that will help your cake stay soft and tasty.
First, think about adding wet ingredients like yogurt or sour cream to your batter. These ingredients add acidity and fat, which make the crumb soft and fluffy without making the cake heavy. If you want a more traditional look, brush a thin layer of homemade simple syrup (a mix of sugar and water or juice) over the layers of cake that have cooled. This sticky layer retains moisture and introduces a touch of sweetness, ensuring that every bite dissolves delightfully in your mouth.
It’s simple to substitute some of the butter with vegetable oil. Oil remains in a liquid state at room temperature, contributing to the prolonged moisture of your cake. Timing is just as important; overbaking will dry out the food. Check early and remove a clean toothpick immediately to prevent blocks from drying out. Finally, mix your ingredients together carefully. If you mix too much, the air will get out of your batter, making the cake dense instead of fluffy.
These tricks for adding moisture not only improve the cake taste, but they also keep it fresh for hours, so every gamer, kid, or party guest can enjoy a slice as epic as your design.
How to Avoid Decoration Fails
Using bright colors and sharp pixel patterns to decorate is fun, but it can be a tricky dance. Colored icing adds a whole new level of difficulty that can confuse even the best cake decorators. However, if you know what to avoid, your Minecraft cake will look wonderful.
First, the temperature is crucial. Applying frosting or fondant to a warm cake can lead to it sliding off or melting, which would spoil the edges you’ve meticulously crafted. Always make sure your cake layers are completely cool before you start decorating. A solid, cool base helps your icing set just right and keeps things in place.
Next, color bleeding is a common problem. When different colors mix too soon, they make the sharp pixel edges that are important to the Minecraft style less clear. To avoid this, let each color set for a little while before adding another. Choose gel or paste food colors instead of liquid dyes because they are less watery and less likely to run. When piping fine lines or tiny squares, a steady hand and clean tools can make a big difference.
Fondant is excellent for making sharp edges, but it needs to be conditioned properly. If it gets too dry, it will crack or tear, especially around tight corners. Knead your fondant until it is soft and cover it while you work to keep it moist. When you apply it, gently score and stretch the fondant over the edges so it doesn’t split.
Lastly, you need to be patient. Putting too many small pixel details on your cake makes it look messy and makes it difficult to decorate. Minecraft cakes are known for their simple, bold blocks, which are also easier to beat without problems.
You can avoid decoration disasters and make a Minecraft cake that tastes excellent and looks amazing by carefully controlling these things: temperature, color, fondant, and design clarity.
If you learn these simple baking tips, you’ll soon be able to make Minecraft cakes that are both beautiful and tasty, similar to the ones in the game. Your baking journey is sure to be a giant success because every block is perfectly shaped, every bite is moist and tender, and the colors are as sharp as a creeper’s stare.
Amazing Minecraft Cake Decorating Ideas
Famous Minecraft Blocks and Characters
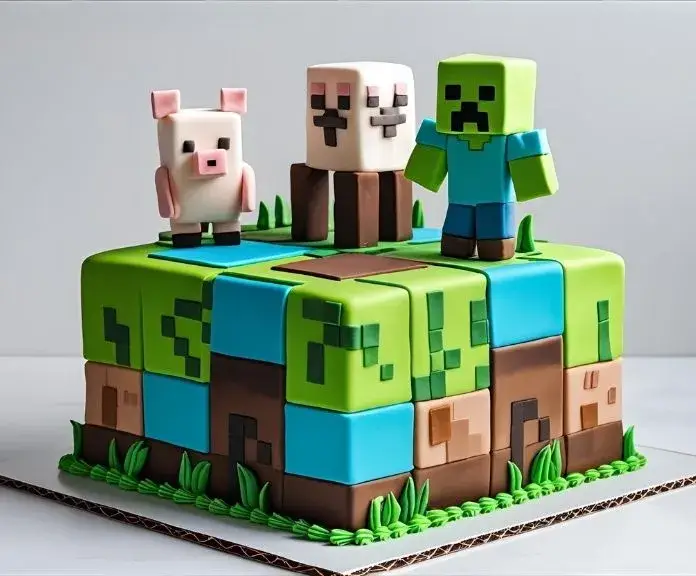
Minecraft’s instantly recognizable blocks and beloved characters are the best way to show what the game is all about. Transforming those pixelated wonders into food art elevates your cake from merely a dessert to a captivating centerpiece for a story. Imagine the naughty Creeper, stuck in that famous green grid forever, coming to life with carefully made squares of fondant or icing. The challenging part is making those blocky textures look bright and full of life.
Begin with simple block designs like dirt, grass, stone, or diamond ore. Cut small squares from fondant in bright greens, earthy browns, smooth greys, and sparkling blues. Stack these on your cake so each “pixel” stands out, in keeping with the game’s style. If you want to make characters like creepers, pigs, or endermen, use small 3D fondant figures placed in the right places to make scenes that come to life. Artistic elements like Piggy’s snout, Creeper’s luminous eyes, and chunky limbs require time and creativity, yet they enhance the enjoyment of your cake even further.
Add shading, depth, and a lifelike glow to these figures by using edible paint or food coloring dust. Adding a little shine to diamond ore or soft shadows under characters can make a big difference. It turns simple blocks into Minecraft moments that guests will love.
Creative Ways to Use Edible Figures and Toppers
Edible toppers are the best way to make any Minecraft cake look better right away. They are a fun and useful way to add height, texture, and interactive elements to your design. Toppers make a flat cake look like a three-dimensional battleground of fun by adding custom-made pixel blocks made of colored fondant, tiny sugar paste trees, and tools.
Instead of just sugar figures, try Rice Krispies treats shaped like TNT blocks or cookies that look like Minecraft items. They add crunch and variety. To make the cake look taller and more intriguing, use toothpicks or skewers to place it in a way that draws guests’ attention and encourages them to look at it from all sides.
To make your cake even more fun, mash up edible Lego-like cubes that guests can “build” around. This way, the cake is not only a treat but also an interactive experience that everyone can enjoy. Adding piped icing pixels or fondant surfaces to toppers makes them look more detailed and deep. To make things look like they’re in the game, you could lightly sprinkle edible glitter or cocoa powder on top. This introduces depth and a gentle shimmer that evokes memories of the pixelated universe of Minecraft.
But don’t use too many toppers; the best Minecraft cakes have a pleasing mix of simple and detailed. Using too many decorations that resemble clusters can make the design appear overly busy, while a select few can enhance your party cake’s fun and friendly appearance.
Making Minecraft Party Themes Your Own
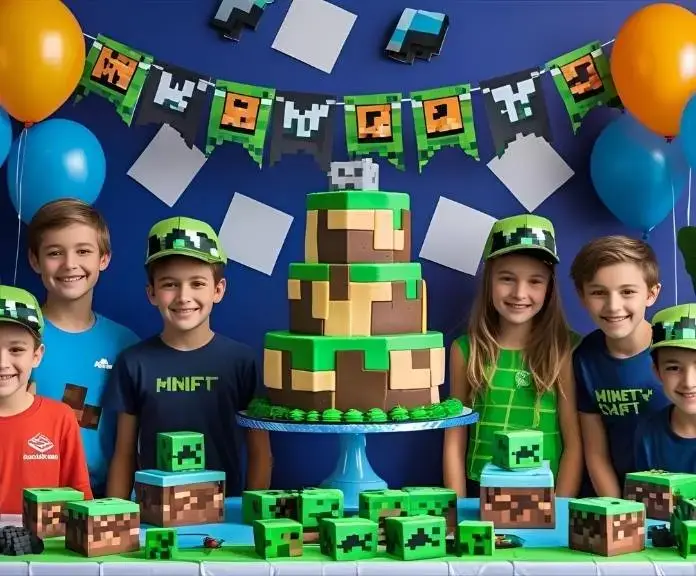
A Minecraft cake isn’t just a cake; it’s the best part of the party. By seamlessly adding your cake decoration to a bigger Minecraft theme, you can make the whole party feel like one big, immersive experience. Think about your favorite blocky world and how it would look if it were real.
Pick a color scheme for your banners, balloons, and tableware that is based on the blocks in your cake. These colors could be lime greens, earthy browns, cobblestone greys, and diamond blues. To make the cake look even better, add accessories like creeper face masks, piggy hats, or pickaxe props that go with it.
The cake can also tell the story of the party. For instance, if the theme of the party is “Minecraft Adventure,” you could use edible maps, craftsman tools, or cake tiers that look like desert dunes, forests, or oceans and stack up like layers of a Minecraft world. Custom cupcakes that look like redstone torches or gold nuggets are excellent additions to your main cake.
Please remember to have interactive games or activities near the cake station that have to do with the design. For example, you could have a scavenger hunt for “hidden diamonds” or building contests with edible sugar cubes. Such events will keep the energy up and tie food to fun.
You can make your cake the center of an unforgettable experience by matching the decorations to the party’s theme and activities. This will get everyone in the spirit of Minecraft. This all-encompassing approach makes baking and decorating a celebration of creativity and fandom instead of just an art form.
If you learn how to use these Minecraft cake decorating ideas, your cake will have personality, charm, and a well-thought-out design. You create more than just a cake when well-known blocks come to life, edible decorations enhance the artwork, and party themes unite everyone. You create lasting memories with each delicious bite.
The Best Themed Minecraft Cake Party
Making a Minecraft cake isn’t just about mixing the ingredients and frosting the layers. It’s also about using decorations, flavors, and smart designs to tell a story. To elevate your cake to a higher level, you must learn how to rectify last-minute baking mistakes, integrate party elements, and showcase your creation to the world. Here’s how to make your Minecraft cake experience truly one-of-a-kind, human, and unforgettable.
Adding Party Elements to Your Cake
The key aspect of a themed cake is its integration into the overall celebration. To make a Minecraft party that feels real, start by making sure the design of your cake matches the mood of the party. Use bright greens for grass blocks, earthy browns for dirt, and cool greys or blues for stone and diamond ores to inspire not just your cake but the whole setup. Coordinating these hues for balloons, table settings, and decorations creates a Minecraft-themed environment that captivates everyone.
You can use fondant or carefully piped buttercream to make edible figures of famous Minecraft characters like Creepers, pigs, and Steve. These will get people excited and make the cake the center of attention for the story. To make your cake even better, add some related snacks like pixelated cookies or even cottage cheese pancakes to the snack table. These will give your guests a delightful variety of flavors and textures while still staying true to your creative spirit.
Add small touches like edible Minecraft tools or blocks on top of your cake or around the serving area to make it look like a “crafting table.” Such an arrangement not only improves the cake’s look, but it also gets guests more involved because they can see and connect with the Minecraft world beyond just the cake itself.
Quick Solutions for Baking at the Last Minute
No matter how carefully you plan, unexpected issues can arise, such as an oven breaking, frosting not turning out right, or running out of time. But don’t let the things that stress you out ruin your epic Minecraft cake adventure. Smart last-minute fixes can save the day with little trouble.
Employ a serrated knife to even out your cake layers if they are not uniform or are falling apart. Then, add simple syrup to bring back moisture and achieve a smooth texture in the cake. Put your cake in the fridge to Be cautious if the frosting melts or slides off. To fix fondant tears or wrinkles, warm the fondant in your hands or mist it with water, then smooth it out.
When you’re short on time, keep it simple by using large fondant squares instead of complicated pixel piping. They still look like blocks, but they are easier to apply. Consider using store-bought edible Minecraft toppers to instantly add personality without the need to create anything else.
Make a list of everything you need to prepare before baking day, including extra frosting colors, fondant, and snacks (such as the delicious Cottage Cheese Pancakes) to maintain your energy while you creatively solve problems. These simple strategies turn unexpected challenges into opportunities. These straightforward approaches turn unexpected obstacles into chances for achievement.
Showing off your work on social media
Sharing your Minecraft cake with others isn’t just about showing off; it’s also about being part of a creative community and inspiring others. When you take pictures of your cake, think about the lighting, angles, and background to get that perfect, shareable shot.
When you can, use natural light to get colors and textures that look real. To tell the story behind your creation, try getting close-ups of the pixel details and wider shots of the whole party setup. Use Minecraft-inspired props like pickaxes, torches, or printed game screenshots to make captivating compositions.
Use popular Minecraft baking and party hashtags to get in touch with other fans. Check out Ammy Recipes to see how bloggers use captivating pictures and detailed stories to make their own “The Best Fruit Smoothie Without Yogurt You’ll Ever Try” experience. Incorporate their blend of personal style and professional polish to enhance your Minecraft cake content.
You can also make short videos or reels that show quick decorating tips or how to open party gifts to make things more captivating. Encourage your followers to share their builds or give you tips. This will turn your post from a one-person show into a lively conversation.
You can turn your cake from a simple dessert into an immersive experience by carefully incorporating party themes into it, learning how to use quick saves to fix baking problems, and showing off your work online. This method honors both your creativity and your ties to the larger Minecraft and baking communities, layer by pixelated layer.